So here, courtesy of Dunedin Public Art Gallery, are a few finished shots from last week's shoot.
The Goldie is one of DPAG's most popular works. It's a Kiwi icon, and I had "American Gothic" in mind with my setup for the shot. My models were kneeling for this, to cheat the angles, since the painting is hung rather low.
Another popular one, the Van der Velden. I originally included another foreground doorway, but the double foreground started to overwhelm the painting rather than frame it. It also stretched my chain of radio and optical triggers to the maximum!
With time up our sleeves, we decided to do something with the Monet. Again, Tim was kneeling for the shot to cheat the angle here. I was wary of the double shadow on the frame, but ended up liking the balance and 3D effect it gave the painting . Found Art, like my old writing Guru John Vorhaus says.
Monday, February 15, 2010
Sunday, February 14, 2010
Pre-visualisation
One tool I'm starting to use more in my work is Pre-visualisation: making a graphic depiction of the final shot I'm trying to achieve. Not only does it give me something clear to work towards, it helps me make sure my clients don't get any nasty surprises and lets my models know what sort of thing I'm looking for from them.
For my Dunedin Public Art Gallery shoot, I started with some recce pictures taken on my phone, the HTC Magic. Saves me lugging my kit to the location when I don't really need to, and the file sizes are reasonably small. The only downside is that in low light situations, phone cameras need steady hands to avoid blur; no biggie.
Back at the lab, I import the shots into CS3 and start work. First thing I did with these was to obscure the works with a mosaic filter - gotta respect other peoples intellectual property, even when they're long dead. I'll show the finished shots as soon as I know from the gallery that they're clear to use. Next, if I'm using a model, I'll pop a figure into a new PS layer. Since I'm an abysmal artist, I use silhouette vectors. There's a great selection free to use here.
Finally I add the lighting effects I'm looking to achieve. This is the part that really helps me when it comes to the shoot. It means I've thought out my light placement, lighting ratios and the places where I don't want light to fall, so on the day I can go straight for the combination of lights, modifiers and stands I need. To do this in CS3, I use the Render/Lighting effects filter, a great little tool for this job. If you're lighting more than one part of the frame separately, it takes a few layers to get things looking right, but the effort is worth it. I use the paintbrush tool to draw rim light on my silhouettes, and I'm done. It's not perfect, but it's enough to communicate my ideas with.
I send a copy to the client to check I'm on the right track, and load the pre-visualisations back onto my phone so I've got a handy reference in my pocket. In this case, Tim at the Gallery told me one of the works I planned to use was going to be a pain for him to clear in time for the publication he was planning, so that was one setup scratched. Thankfully he liked my plans for the others, so on the day we got what we planned, and had time to experiment with a couple of other ideas Tim had. Happy client. Happy Photog.
Thursday, February 11, 2010
Art for Art's Sake...
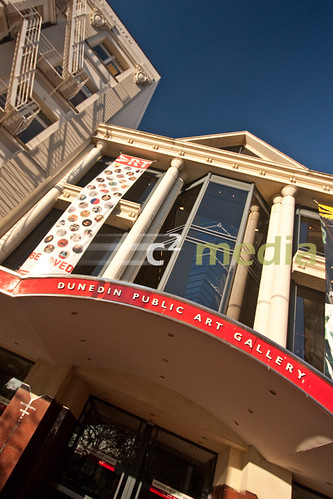
..Money for God's sake. That's a 10CC song, for all those under 40. Today I had a great time down at Dunedin Public Art Gallery, shooting promotional pictures for their "Beloved" exhibit, a collection of some of the best loved works held by the gallery. I'm going to hold off displaying the shots for now, until I'm absolutely sure I have clearance to use images of other artists work. Gotta respect those intellectual property rights.
I asked for a couple of museum staff to model for me and I got the best - the marvellous and patient Tim "please watch out for the art work Clive" Pollock and Geva "Haunted Love" Downey. We shot some of the gallery's real icons, so I wanted Tim and Geva to be faceless and low lit, to make the paintings the centre of attention, but at the same time helping to frame and draw us into the art.
I got to play Strobist with all my flashes again. Every session is an education - and a thourough test of my gear. I've just got a new 2nd hand 540EZ flash, which really helps light the big spaces. The gallery's Monet was a bit of a challenge, so I created some shadows for added drama, and threw in a tilt for a little extra intrigue. Tim felt it's not Monet's most striking work and needed a little oomph. I think he was pleased with what we got.
My favourite - and everybody elses - is the Goldie. It's one of the gallery's most popular works. There's the wonderful character of it, but it's also a genuine Kiwi icon. It didn't need much more than a little light and someone to draw your attention to it.
I really enjoyed this shoot. Not just for the joy of working hard and creating pictures, but I got a good look at other peoples work and their approach to lighting. You can learn a lot from Gainsborough and Cooper. Art for Art's sake. And I get paid for this. 10CC.
Monday, February 8, 2010
The Wedding Biz
There are two types of photographers out there: The ones who love weddings, and the ones who run a mile from them. I can sympathise with both.
On the pro side, weddings can be pretty lucrative gigs when you make a name for yourself. On the con side, wedding photos are pretty important to a client, and you want to deliver a good product so much that there can be a fair bit of stress all round. I'm lucky enough to have had wonderful and relaxed clients so far, so you can count me in the first group. Wedding shooting is this great mix of documentary-observational shooting and formal portraiture. I guess the observational part comes easiest to me, having worked in documentaries for so long.
The formal and creative parts are where the biggest and most exciting challenges are. Arranging everyone naturally, avoiding cliches and making sure everything is to the highest technical standards all take time, and when you're working with groups on location, time is what you often have little of. Every shoot is a lesson. These shots came from a wonderful wedding I covered at the end of January. The wedding biz can eat your weekends, but the rewards are many.
Coffee Contra
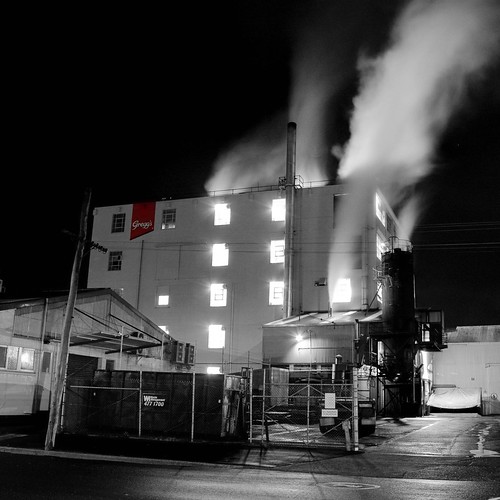
The other day I had a nice email from Andrew Lane at Cerebos Greggs. Andrew was taking part in an in-house competition, had found one of my pictures on Flickr and was aksing permission to use it. Here's the shot:
It's Dunedin's Gregg's coffee factory, taken last autumn on one of my early night shoots. I was happy to let Andrew use the shot for a one-off event, and in return, a goodie box of fine Cerebos Greggs products arrived with today's mail - sauces, teas, coffees and to the delight of my number one model and lighting assistant, jelly. Thanks Andrew, I love contra deals.
It's nice to be asked permission to use a shot. I'm nearly always likely to grant it for free or a small consideration depending on the use. If you're not sure, just check. And remember, I can be hired and nearly all of my work can be bought. If you don't have single malts, BBQ sauce or rock salt to barter, don't worry. Like my Dad used to say: "Cash never offends".
Must take some pictures of the local breweries ASAP.
Thursday, February 4, 2010
Hello Summer!
It was a long wait, but Summer has finally made it to Dunedin, so I've been making the most of it with the family. That means photography has had to take a bit of a back seat, but when the opportunity has let me, I've made a few shots.
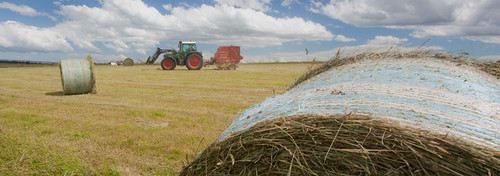
I've wanted to shoot some hay bales for ages, so coming back from a little fishing/picnic day trip, I had to stop and try some with this paddock. Problem was, the sun was high and bright, not conducive to the long shadows and golden light type of thing I was looking for. But I believe every set of circumstances offers an opportunity, so I shot in the hard light and worried about it later. When I got home I decided to lift the exposure and desaturate some shots - getting away from my usual style, and emphasising the hot dry nature of the day. I'm happy with the results, although I would like to do it again. One new subject I found was the bale wrappings that flap on the wire fences like prayer flags. I really want to do those justice some time, play with the motion, which is one aspect of shooting stills I haven't really worked on yet.
Between keeping up my fluid balance, manning the barbecue and swimming, my family vacation left me little time for photography either, but I did follow the kids up the creek for a few minutes to shoot a traditional Kiwi kids holiday activity - Cockabullying.
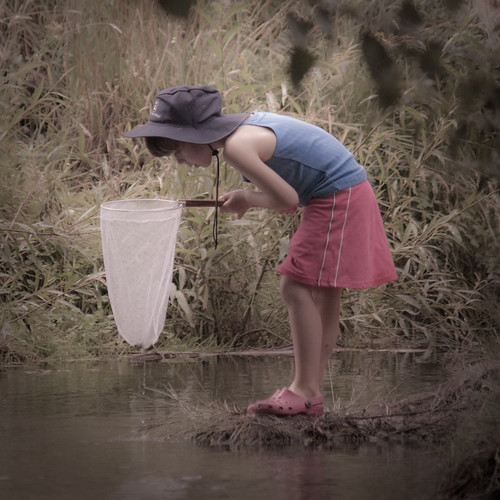
Again, I tried desaturating to give this a more timeless feel. I'm not sure if I'll ever be in the same league as Fiona Andersen, she does beautiful kids shots, with some stunning post-production. Check her stuff out if you get the chance, she's pretty talented.
One shot I did want to get was something to sum up my vacation. I knew what I wanted - a shot of my favourite pastime at Glendhu Bay, Wanaka. But it was kind of dangerous to take my DSLR into the water, so I decided to take a lesson from Chase "the best camera is the one you have with you" Jarvis, and go get the shot anyway, with my phone. If the image was good and told a story, then bugger the megapixels. Glad I did. So here's what it's like to be me on vacation.
I framed it, like I do with all the shots I put out on my "Shot of the Week" mailing list. If you're not already on it and would like to be, drop me a line.
Well, holiday's over. This is going to be a year of work, and lots of it in photography. I've already shot one wedding (half way through my vacation), have another coming up, and have another cool promotional shoot to work on next week, so stay tuned.
Subscribe to:
Posts (Atom)