
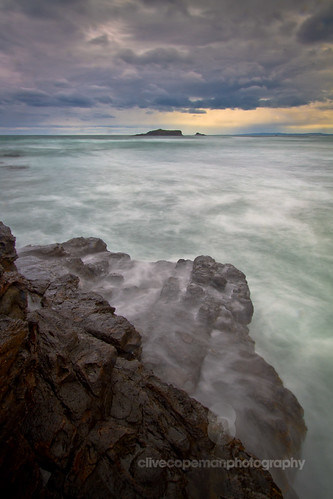
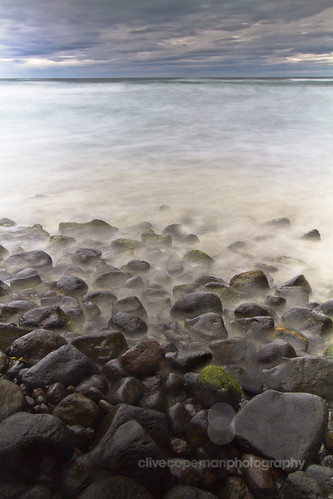
For ages now I've been wanting to do some long-exposure water shots along the rocky shoreline. I'm talking exposures of at least 5 to 10 seconds, to turn the waves into a mist-like veil over the rocks. The problem with such long exposures is that even at apertures as tiny as f/22 and ISO at 100, ordinary light levels will blow out your highlights so much all you'll see are a few dark rocks. That means dusk or dawn shooting - golden hour stuff. If conditions are right, you're going to get stunning stuff, but the right combination of tide, sun and weather doesn't come too often.
The answer is to use a neutral density filter. It's a plain grey filter that just cuts down the amount of light reaching your lens, so that the time needed to get a good exposure is longer.
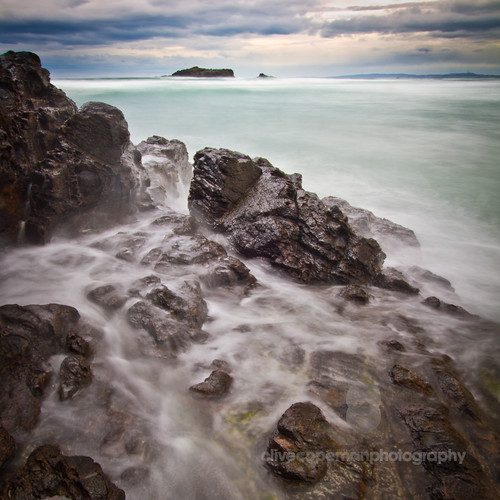
I've had a little ND filter for a while now, but it wasn't really dark enough to knock daylight right back, and it's too small to fit my new L-series lenses. So the other day I sent away for a Light Craft Workshop Fader ND II filter. It'll allow you to drop your exposure by 2 to 8 stops. It had been sitting in my bag for a few days, so yesterday I decided to brave the wet and windy conditions and head over the hill to Smaill's beach to give the thing a test run.
To say conditions were sub-optimal is a gross understatement. The wind lashed me and my gear with sand, and I was constantly wiping rain from my lens. I got a handful of shots that demonstrated the effect, but nothing great. So I went out again today and got the images you see here.
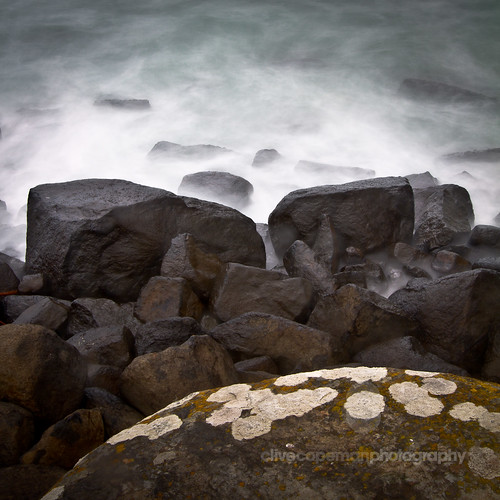
Lessons learned? The first one is that like all landscapes, you've still got to have a good strong focal point to your picture. The flowing effect is nice, but it's got to be balanced by some clear fixed stuff in the frame, like exposed rocks. Getting that balance right isn't easy, but I'm working on it. Plenty of lens wipes are essential. You're going to want to be close to the wave action, so be prepared to protect your gear from the salt spray with a housing or rain jacket. I find plastic shower caps or food covers really convenient. You'll also need to check your lens for spots frequently. There are a few shots here spoilt by the odd rain or wave spot or two (I tidied most of those up in lightroom). Plenty of lens wipes and a little lens fluid will help too.
Next steps? Well, Smaill's is handy, but there are better spots to try - like the classic Moeraki boulders. I also want to apply the technique to wind blown grass in a paddock, and clouds, both at night and during the daytime. All that, and some of it in golden hour light. Maybe then I'll have something really good.
Stick around, there's plenty to do before then.
These look really cool! I love the composition of the second and last image - I need to get a ND filter and head out around the coast a bit more. Any tips on protecting the gear, the salt would be pretty harsh...
ReplyDeleteI advise taking plenty of lens tissue to keep the splashes off your filter and a little lens fluid or fresh water in case any salt dries and forms a crust or smear. A plastic bag or jacket for your camera isn't a silly idea if there's lots of wave action. I also sponge my camera body and lens off in fresh water and dry it after the shoot.
ReplyDelete